The Laser
Print & Cut
Cut exactly around a print, run a second pass over an existing cut or resume a job, from two registration targets.
Laser menu › Print & Cut… (⌥⌘0): cut around a design that is already printed, run a second pass over an incomplete cut, resume an interrupted job or cut a large project in several parts. The laser must be connected and homed (it reports its head position); always move it with the keyboard or the panel, never by hand.
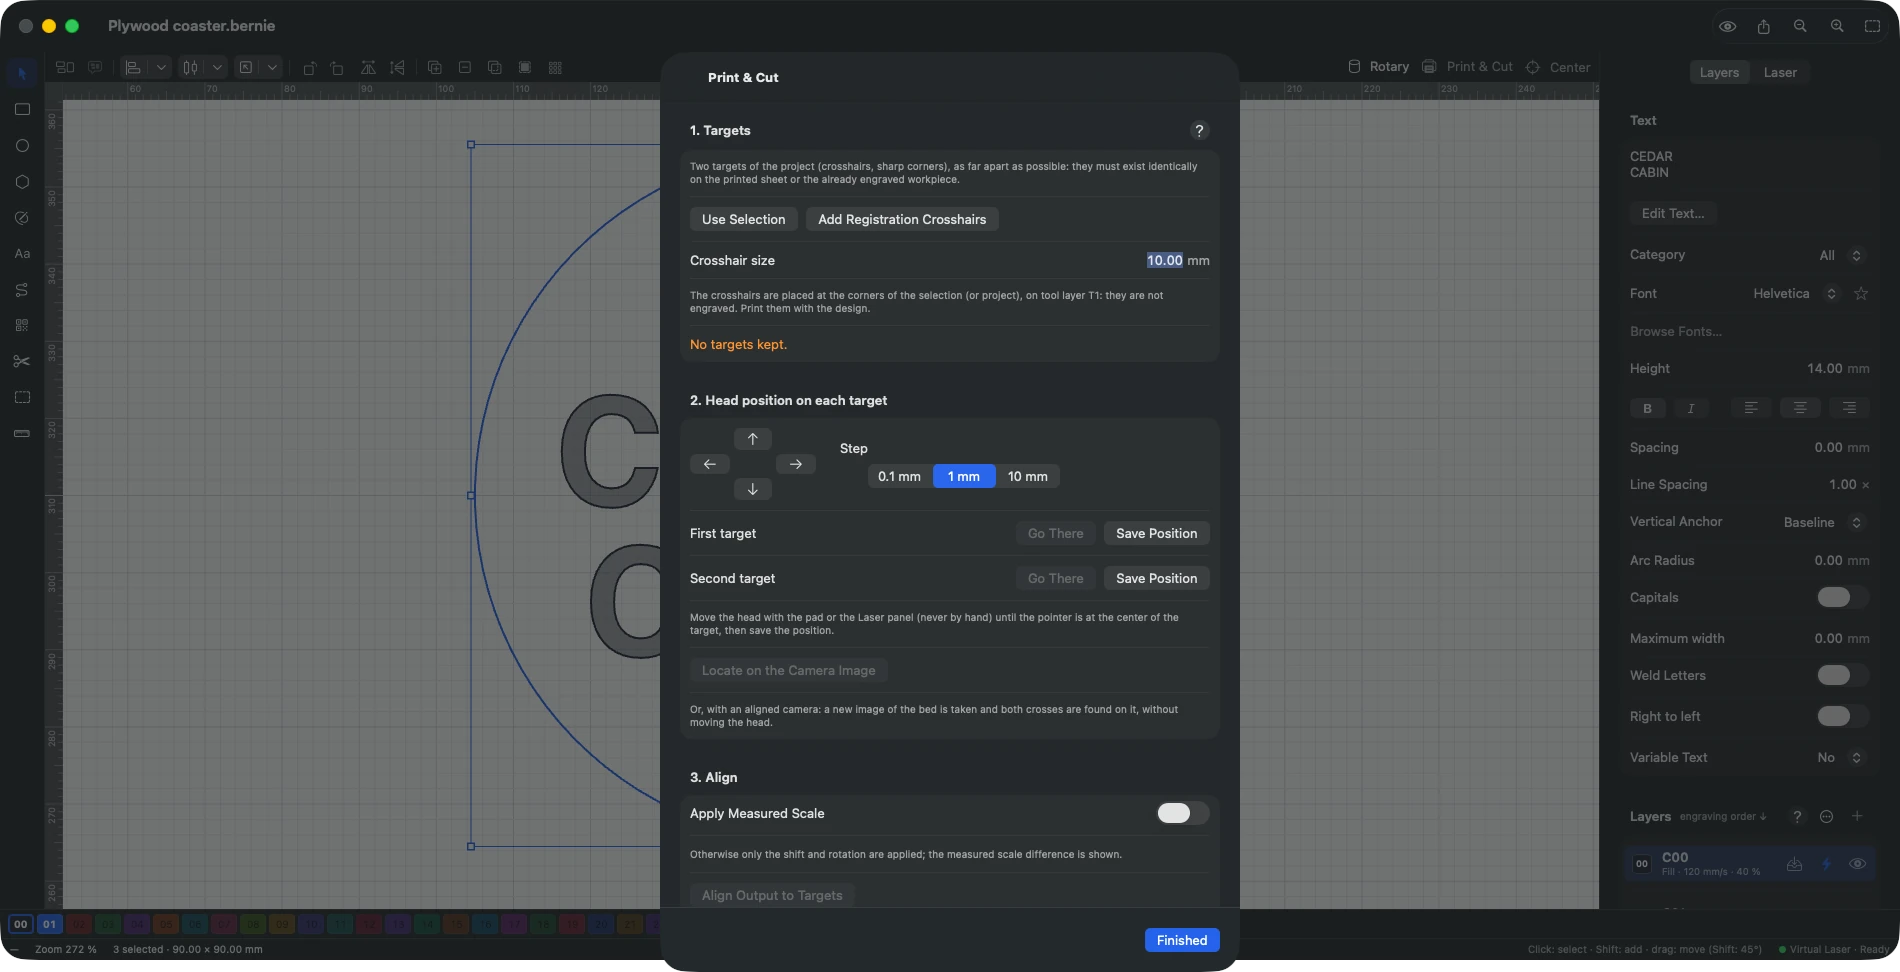
- Targets: two elements of the project, as far apart as possible, that exist identically on the sheet or the workpiece. Use Selection keeps the two selected objects (or groups); Add Registration Crosshairs places two crosshairs at the corners of the selection (or project) on tool layer T1, never engraved: print them with the design. For a second pass, place two small crosshairs on sharp corners of the existing cut.
- Head position: for each target, Go There brings the head where the target is in the project; adjust with the pad (steps of 0.1 to 10 mm) until the pointer is at its center, then Save Position. With an aligned camera, Locate on the Camera Image takes a new image of the bed and finds both crosses on it (sharp lines, sheet turned 15° at most, within 25 mm of their place in the project), without moving the head; a cross that is not found is recorded with the head. Accuracy depends on the camera (often a few tenths of a mm). With a camera mounted on the head and aligned (see Camera), Locate with the Head Camera replaces this button: the head brings the camera over the first target, where the project places it, finds the cross there, then centers on it to record it at the center of the image; it then moves on its own to the second, looked for where the first one, once found, places it. A cross that is not seen is looked for all around (eight shots in a ring); if it still cannot be found, bring the camera over it with the pad, then Search Here. Stop interrupts the search. A corner or an edge of the printed design next to a cross is not mistaken for it.
- Align Output to Targets: the whole project (locked objects included) is moved and rotated so that the targets land on the saved positions, and the start switches to absolute coordinates; a single action to undo. The measured scale is shown (beyond a 2 % difference, check the print scale); Apply Measured Scale applies it too.
This manual is also built into Bernie: press F1, or open the Help menu, to read the topic for what you are doing. A mistake, a missing answer? Tell us
Try it in Bernie, for free.
Free laser engraving and cutting software for diode, CO2, fiber and galvo lasers. Windows, Mac, Linux, iPad, iPhone and in the browser.