Bernie User Guide
Editing Shapes
Booleans, offset, warp, the art library and its free downloadable drawings, alignment, arrays and nesting: everything that reshapes a design.
- Shapes › Union, Subtract, Intersect: combine the selected closed shapes (for Subtract, the last selected shape is removed from the others). The result keeps true curves and its corners.
- Shapes › Offset Path…: grows or shrinks (round, sharp or bevelled corners). Repeat Last Offset (or ⌘-click the toolbar button) applies the same settings without opening the dialog.
- Shapes › Auto-Join: joins lines whose ends touch; Close Paths…: closes paths whose ends are close; Rebuild Curves: turns runs of small segments (DXF, tracing) into curves; Delete Duplicates.
- Shapes › Cut With Shape: the closed shape selected last cuts the others (shapes and lines) into an inside part and an outside part; it disappears. An image becomes two masked copies: one limited to the inside of the shape, the other to the outside. Mirror Across Line: mirrors the objects across the line selected last. Shear…: slants the selection (horizontally or vertically). Warp (4 Corners): drag the magenta corners of the selection and the shapes follow; each corner drag is undone separately; Enter, Esc or a click elsewhere finishes. Warp (16 Points): a 4 × 4 grid of handles for free-form warping (making a text follow a shape); Shift repeats the drag mirrored on the left-right symmetric handle, Option on the top-bottom one, a double-click resets a handle.
- Shapes › Boolean Assistant… (two closed shapes selected): shows union, A minus B, B minus A, intersection and exclusion side by side; one click applies the chosen result.
- Shapes › Rubber-Band Outline: adds a shape that wraps the selection, like a rubber band stretched around it.
- Shapes › Optimize Shapes…: fewer nodes for paths made of small segments (DXF drawings, traced images) — smooth curves, lines only, or arcs and lines (shorter G-code, smoother moves), within the chosen tolerance; the dialog shows the node count before and after.
- Tools › Art Library…: your reusable drawings, sorted into libraries (New…). Add Selection… stores the selection (shapes, groups, their layers’ settings, images); one click on a thumbnail inserts it at the center of the view; right-click: rename, replace with the selection (the edited drawing keeps its name), move to another library, delete. The … menu: Import Bernie Files…, Show Folder (Application Support/Bernie/art, to back them up or share them), Rename Library…, Delete Library… (its drawings go to the Trash). In Bernie Studio: File › Art library… (Rename…, Delete…, Replace and Move to… under each thumbnail; the library’s Rename… and Delete… next to its list; library kept in the browser). Download… lists the libraries published on the Bernie website — basic shapes, frames and labels, geometric patterns, marks and templates: original drawings, free to use — with their number of drawings; Install turns one into a library like the others, Update appears when a new version is published (drawings with the same name are replaced, those you added stay).
- Edit › Mouse Gestures: move, rotate, resize — uncheck a gesture so the handles can no longer do it by accident (the inspector and arrow keys still work). In Bernie Studio: at the bottom of the edit bar’s Select menu.
- Shapes › Resize Slots…: straight notches and mortises of a given width (within the tolerance) get a new width — to fit a joint to the actual material thickness; tabs do not move. The dialog counts the slots found before applying.
- Shapes › Rotate by Two Points: click the pivot, a reference point, then that point’s new position (live preview, snapped to nodes); Rotate and Scale by Two Points also adjusts the size. Esc cancels.
- Fillets (Nodes tool, inspector): a negative radius cuts an inverted fillet; with the two nodes of a rounded corner selected, “Round” redoes it with the new radius and “Remove” brings the corner back.
- Polygon: number of sides and star (inner radius as a percentage) in the inspector; dual star: a second family of points, interleaved with the first, whose tips have their own radius.
- Tools › Tangent Circles…: with three circles selected, shows every circle tangent to all three (up to eight); tick those to create (active layer). The new circles can be used as a base in turn.
- Edit › Invert Selection (⇧⌘I), Select Contained Shapes (inside the selected closed shapes), Select Smaller Shapes (than the largest selected object), Select Circles… (by diameter: holes in an imported drawing).
- Calculations in fields: every number field accepts a calculation (
100/3,(80-4)*2), a unit (2in,1/4",3 cm,72pt) or a percentage of the current value (50%). - Shape power (inspector, Cutting section): a share of the layer’s power for the selected objects (100%: the layer’s) — a lighter detail without creating a layer.
- Group (⌘G) and ungroup, lock (locked objects no longer move and cannot be deleted).
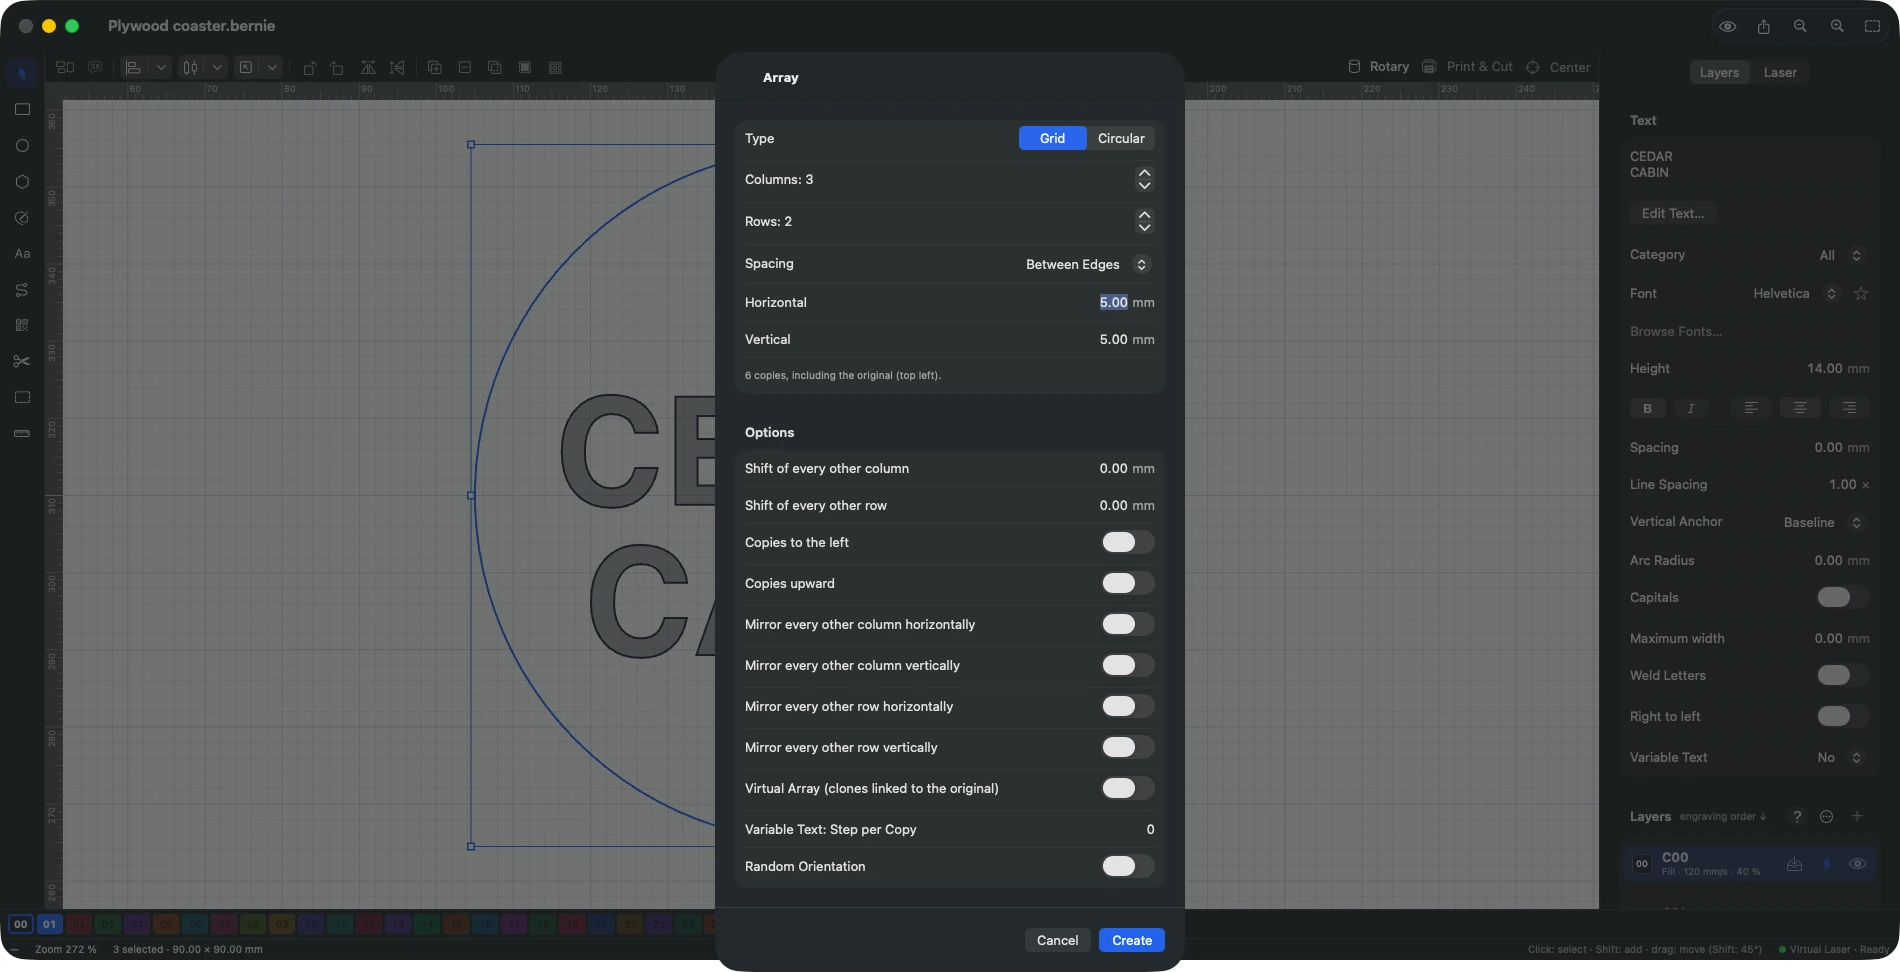
- Arrange: align, distribute, place on the bed, grid and circular arrays. Align › Alignment Assistant… shows each alignment on the workspace on hover; a click chooses it, OK keeps it, Cancel puts the selection back. Virtual Array (checkbox of the Array window, grid): clones linked to the original, dashed, that follow each of its changes (position, rotation, shape); they are engraved and exported but cannot be selected. Right-click the original, or Arrange › Virtual Array: Flatten (independent copies) or Remove Clones.
- Move Together (horizontally, vertically): shapes touch, with no gap, in their order. Same Size: width or height of the last selected object.
- Dock (left, right, up, down): each shape slides until the neighbouring shape or the edge of the bed, with a chosen padding; options: whole selection as one block, keep inner objects together (a hole follows its part).
- Move Under Laser Head: centres the selection under the last known head position.
- Stacking Order: bring to front (⇧⌘]), bring forward (⌘]), send backward (⌘[), send to back (⇧⌘[) — it is also the cutting order when optimization is off.
- Grid Array: besides count and spacing, shift of every other column or row (staggered), copies to the left or upward, mirror every other column or row, random orientation (each copy turns by an angle drawn from a seed: the same seed gives the same layout again).
- Copy Along Path…: select the objects, then the path last; copies spread by count or by spacing, rotated along the path, with progressive size; variable text: step per copy numbers the copies (serial numbers, CSV rows). The copies stay selected.
- Quick Nest…: packs the selection into the bed (or the last selected shape) by the real outline of the shapes, largest first, with spacing, allowed rotations (none, half turn, quarter turns, or every 45°, 30° or 15°), around objects already there; what doesn’t fit goes on extra beds to the right, or stays in place (a message says so). A group stays in one piece; a small part can fit in the hole of a large one. Fine nesting: finer grid and several placing orders tried (by area, height, width, longest side), keeping the best — denser, slower.
- Auto-Group: each closed shape is grouped with what it contains (holes, engravings).
- Cut, copy, paste, duplicate (⌘D duplicates in place); Paste in Place (⌥⌘V) pastes where the copied objects were, without offset.
This manual is also built into Bernie: press F1, or open the Help menu, to read the topic for what you are doing. A mistake, a missing answer? Tell us
Try it in Bernie, for free.
Free laser engraving and cutting software for diode, CO2, fiber and galvo lasers. Windows, Mac, Linux, iPad, iPhone and in the browser.