Bernie User Guide
Layers
One color, one laser process: add and order layers, choose what goes to the laser, use tool layers and the numbered color strip.
Each layer is a laser process, identified by its color.
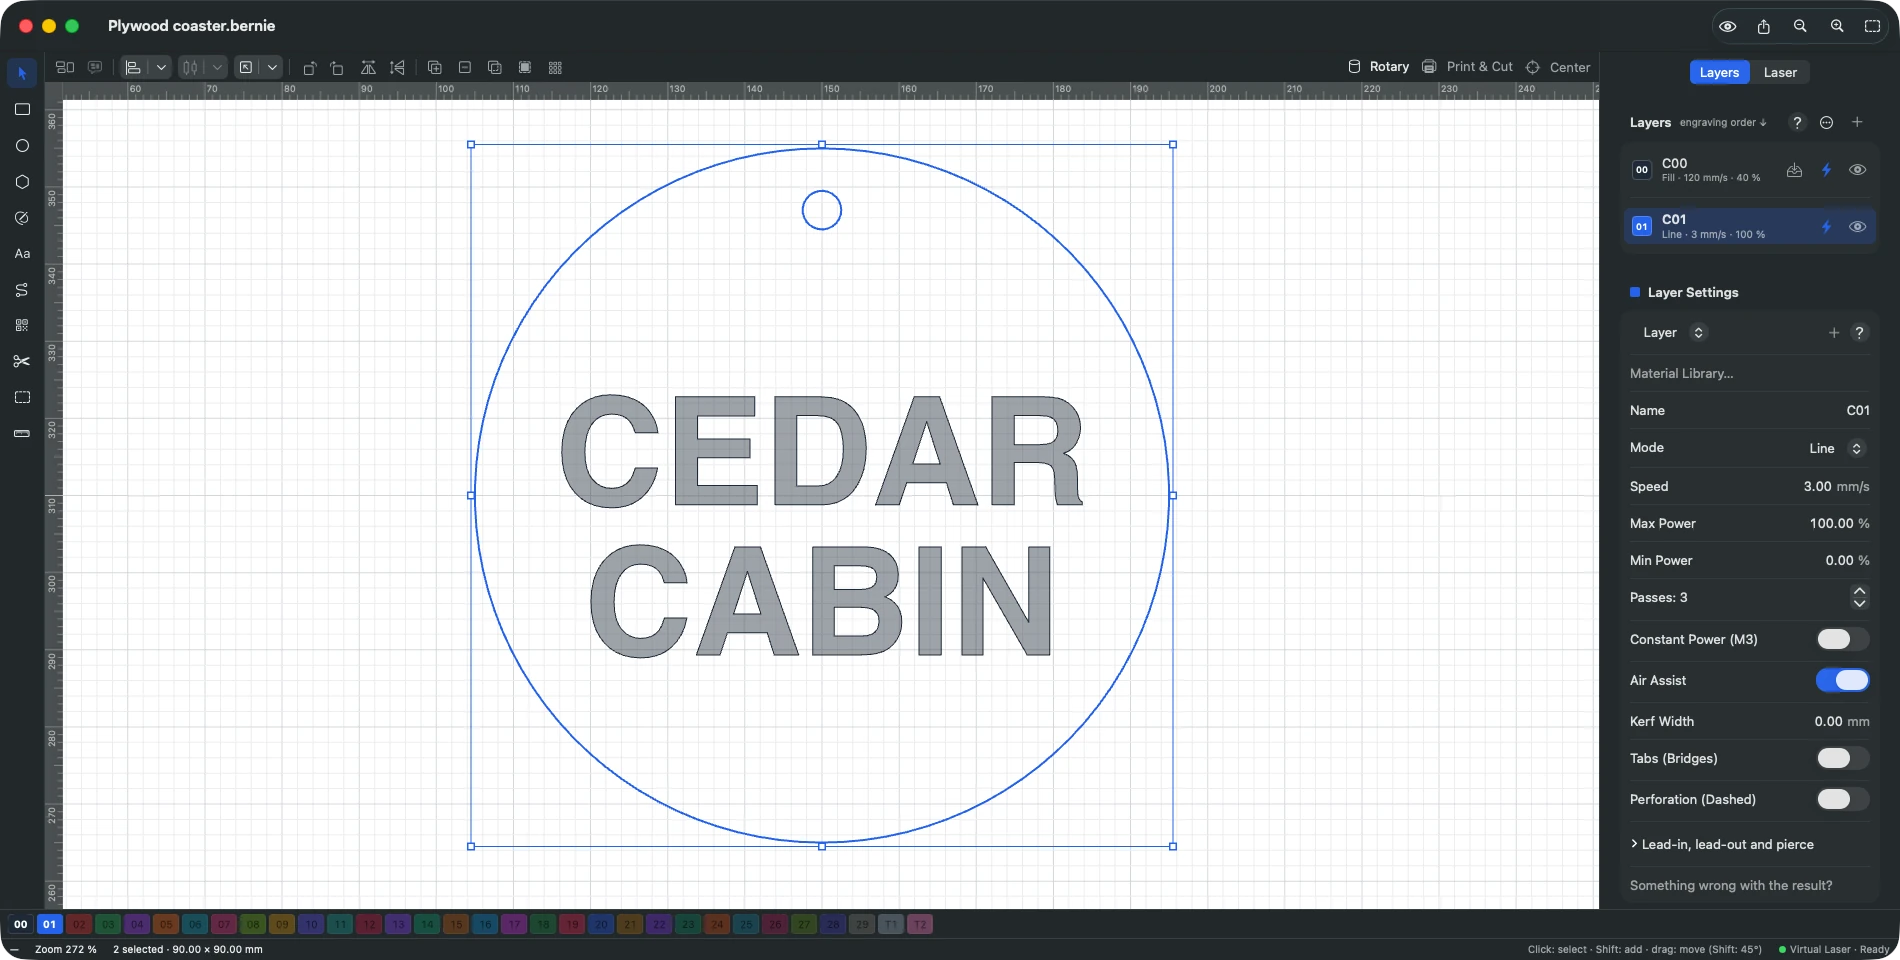
- A new document has a red layer. “+” to the right of “Layers” adds one: its color is chosen for you. A long press on “+” offers the tool layers T1 and T2 (guides and templates, never engraved), and Sort: Cuts Last (layers in Line mode go after the others: a cut-out part could move before being engraved). The “…” menu (or a right-click on the “Layers” header) acts on all layers at once: sent to the laser (all, none, invert), visible (likewise), air assist (everywhere, nowhere, invert), cuts-last sorting — each command undoes with ⌘Z.
- Engraving order: the laser engraves layers from top to bottom. Drag a layer up or down, as in any Mac list: an insertion line shows where it will go (or right-click › Move Up / Move Down).
- Click the color of a layer to choose another; each color shows its layer number (00 to 29), as does the color square on each row. A color marked with a dot belongs to another layer; choosing it swaps the two colors.
- Click a layer: it becomes the active layer (shapes drawn next go on it) and its settings are shown. The selection does not change layer: to move it there, use the button that appears on the layer’s row, or right-click the canvas.
- Lightning bolt: layer sent to the laser or not; eye: shown or hidden.
- Right-click a layer: select its objects, flash them to spot them, move it up or down the output order, copy and paste its settings, add a sub-layer, set the defaults for new layers, delete its objects or the layer.
- Color strip below the canvas: one numbered swatch per color (00 to 29, T1, T2). Solid: the layer has shapes; faded: it has none; outlined: the active layer. Click: selects the layer’s shapes and makes it active (Shift-click adds them to the selection); hovering shows its name and number of shapes. Right-click: move the selection to this layer, or to a new layer.
- Split shapes of a layer (for example after an SVG import): select them, then right-click › Layer › New Layer — they move to a layer of their own, which keeps the old layer’s settings.
- A shape on a fill layer is shown filled (View › Filled Display, on by default; in Bernie Studio, a checkbox in the status bar).
In this section
-
Cut Settings
What each layer mode does and every setting that goes with it: speed, power, passes, tabs, lead-ins, fill interval and angle, overscan.
-
Sub-layers
Apply a second set of settings to the same shapes — a fill then a clean outline — and repeat the whole sequence with global passes.
-
Material Library and Test
Keep the settings that work for each material, add a starter library for your machine, then confirm them with a material test grid.
-
3D models
STL, OBJ, 3MF, PLY, OFF and AMF models turned into a depth map and engraved in relief: side facing the laser, tilt, width, relief and background.
-
Perfect image engraving
Five settings in the right order on the same material, each step opening the right test, for sharp and even image engraving.
This manual is also built into Bernie: press F1, or open the Help menu, to read the topic for what you are doing. A mistake, a missing answer? Tell us
Try it in Bernie, for free.
Free laser engraving and cutting software for diode, CO2, fiber and galvo lasers. Windows, Mac, Linux, iPad, iPhone and in the browser.