A stock K40 laser runs on a Lihuiyu M2 Nano board that does not understand G-code, so most laser software cannot drive it. LightBurn does not support it and asks you to replace the board. To keep the stock board, you need K40 M2 Nano software that speaks its own language: the bundled LaserDRW, the free K40 Whisperer and MeerK40t, and now Bernie, free on Mac, Windows, Linux and in the browser.
Below: what makes the M2 Nano different, how the software options compare, a complete tutorial to frame and engrave on a stock K40 from Bernie, and the same approach for JCZ galvo lasers, which Bernie can now drive without EZCad. The machine catalog grew too, to 125 models.
Why the stock K40 board is different
Most hobby lasers run GRBL or a similar firmware: the software sends G-code, lines of plain text such as G1 X10 Y20. The K40 is different. Its stock board, made by Lihuiyu Studio Labs and labelled “6C6879-LASER-M2” on the M2 Nano, talks to the computer through a CH341 USB chip in its own protocol, LHYMicro-GL. Software has to compute the moves and send them in that format, or the board ignores them.
The other big difference is power. On an M2 Nano, the board can only switch the laser on and off: the power comes from the knob on the K40’s front panel, read on the milliamp meter if your machine has one. Lihuiyu replaced the M2 Nano with the M3 Nano in June 2022, and a recent M3 can receive power from the software. Look at the label on your board before you start: it tells you which one you have.
| Stock K40 (M2 Nano) | GRBL laser | |
|---|---|---|
| Language | LHYMicro-GL (Lihuiyu) | G-code |
| USB chip | CH341 | CH340, CP2102 or native USB |
| Laser power | Panel knob (M2); from the software on a recent M3 | From the software, per layer |
| Grayscale photos | No: use dithering | Yes |
| Software | Only programs that support Lihuiyu boards | Almost every laser program |
Upgrade the board or keep it?
A new controller (GRBL or Ruida) gives you power control from the software and the widest choice of programs, but it costs money and an afternoon of wiring. The stock board is fine for vector cutting, outlines and dithered engraving. Try it with the right software first: you can still upgrade later.
K40 M2 Nano software: your options
Only a handful of programs speak to the stock board. All of them work with the same machine; they differ by platform, price and what else they do.
| Software | Price | Platforms | Stock M2 Nano |
|---|---|---|---|
| LaserDRW, CorelLaser | Bundled with the K40 | Windows | Yes, from the board’s maker |
| K40 Whisperer | Free (GPL) | Windows; Linux and macOS from source | Yes, M2 and M3 Nano |
| MeerK40t | Free (MIT) | Windows, macOS, Linux | Yes, M2 and M3 Nano |
| LightBurn | From $99 | Windows, macOS | No: replace the board |
| Bernie | Free | Mac, Windows, Linux, browser (Chrome, Edge) | Yes, M2 Nano, M3 and B2 |
K40 Whisperer and MeerK40t are mature open-source tools, written by and for K40 owners. Bernie takes a different angle: the same editor, material libraries, preview and pre-flight check as on your other lasers, the same app on every computer, and the K40 shared over the network with Bernie Link. Its K40 support is new: if you own one, your feedback is welcome.
How to run a stock K40 from Bernie
You need the K40 plugged in over USB, a computer running Bernie on Mac, Windows or Linux, or Bernie Studio in Chrome or Edge, and a test piece of 3 mm plywood. The whole setup takes about ten minutes.
- Install Bernie. Get it from the download page: a direct download for the Mac, the Microsoft Store app on Windows, or our APT and Flatpak repositories on Linux. Bernie Studio also runs in Chrome or Edge.
- Free the USB port. Close K40 Whisperer, LaserDRW or CorelLaser: only one program can talk to the board. On Windows, use the Zadig tool to give the board’s CH341 chip the WinUSB driver in place of the manufacturer’s (reinstall the original driver to use LaserDRW again). On Linux, Bernie’s packages install the USB access rule for you.
- Add the machine. In Settings › Devices, click New and choose “K40 (M2 Nano board)”, or pick “K40 CO2 40 W (M2 Nano)” in the catalog: the work area is set to 300 × 200 mm, with the origin at the top left, at the end stops.
- Check the K40 board settings. Board model is M2 by default; change it if your label says M3, B2 or another model. Fill in the Serial Number only if your board asks for it: a locked board refuses jobs without it. Leave the maximum speeds as they are for a first try.
- Connect. Open the Laser panel: in the K40 Laser block, click Connect to the K40…. In the browser, pick the board in the window that opens.
- Prepare the job. Draw or import your design, one colour per layer. On an M2, set the power with the panel knob: the layers’ power is ignored, their speed is not. For a photo, choose a Dithering mode such as Jarvis or Stucki, since grayscale gives no shades. The board does not report where the head is, so place the design in Absolute Coordinates or from your User Origin.
- Frame. Click Frame: the head homes, then travels around the job with the laser off. Adjust the piece until the outline falls where you want it.
- Engrave. Click Engrave… and answer the safety question: the head goes to the origin, then engraves. Paths run in “twitchless” mode; horizontal fills and images are scanned by the board itself, in one direction or both. Pause, Resume… and Stop stay available all along, and Stop is an emergency stop.
- Move the head between jobs. The arrows move it by 1, 10 or 50 mm, Home sends it back to the origin, and Unlock the head releases the motors so you can push it by hand. The next job starts from the origin again.
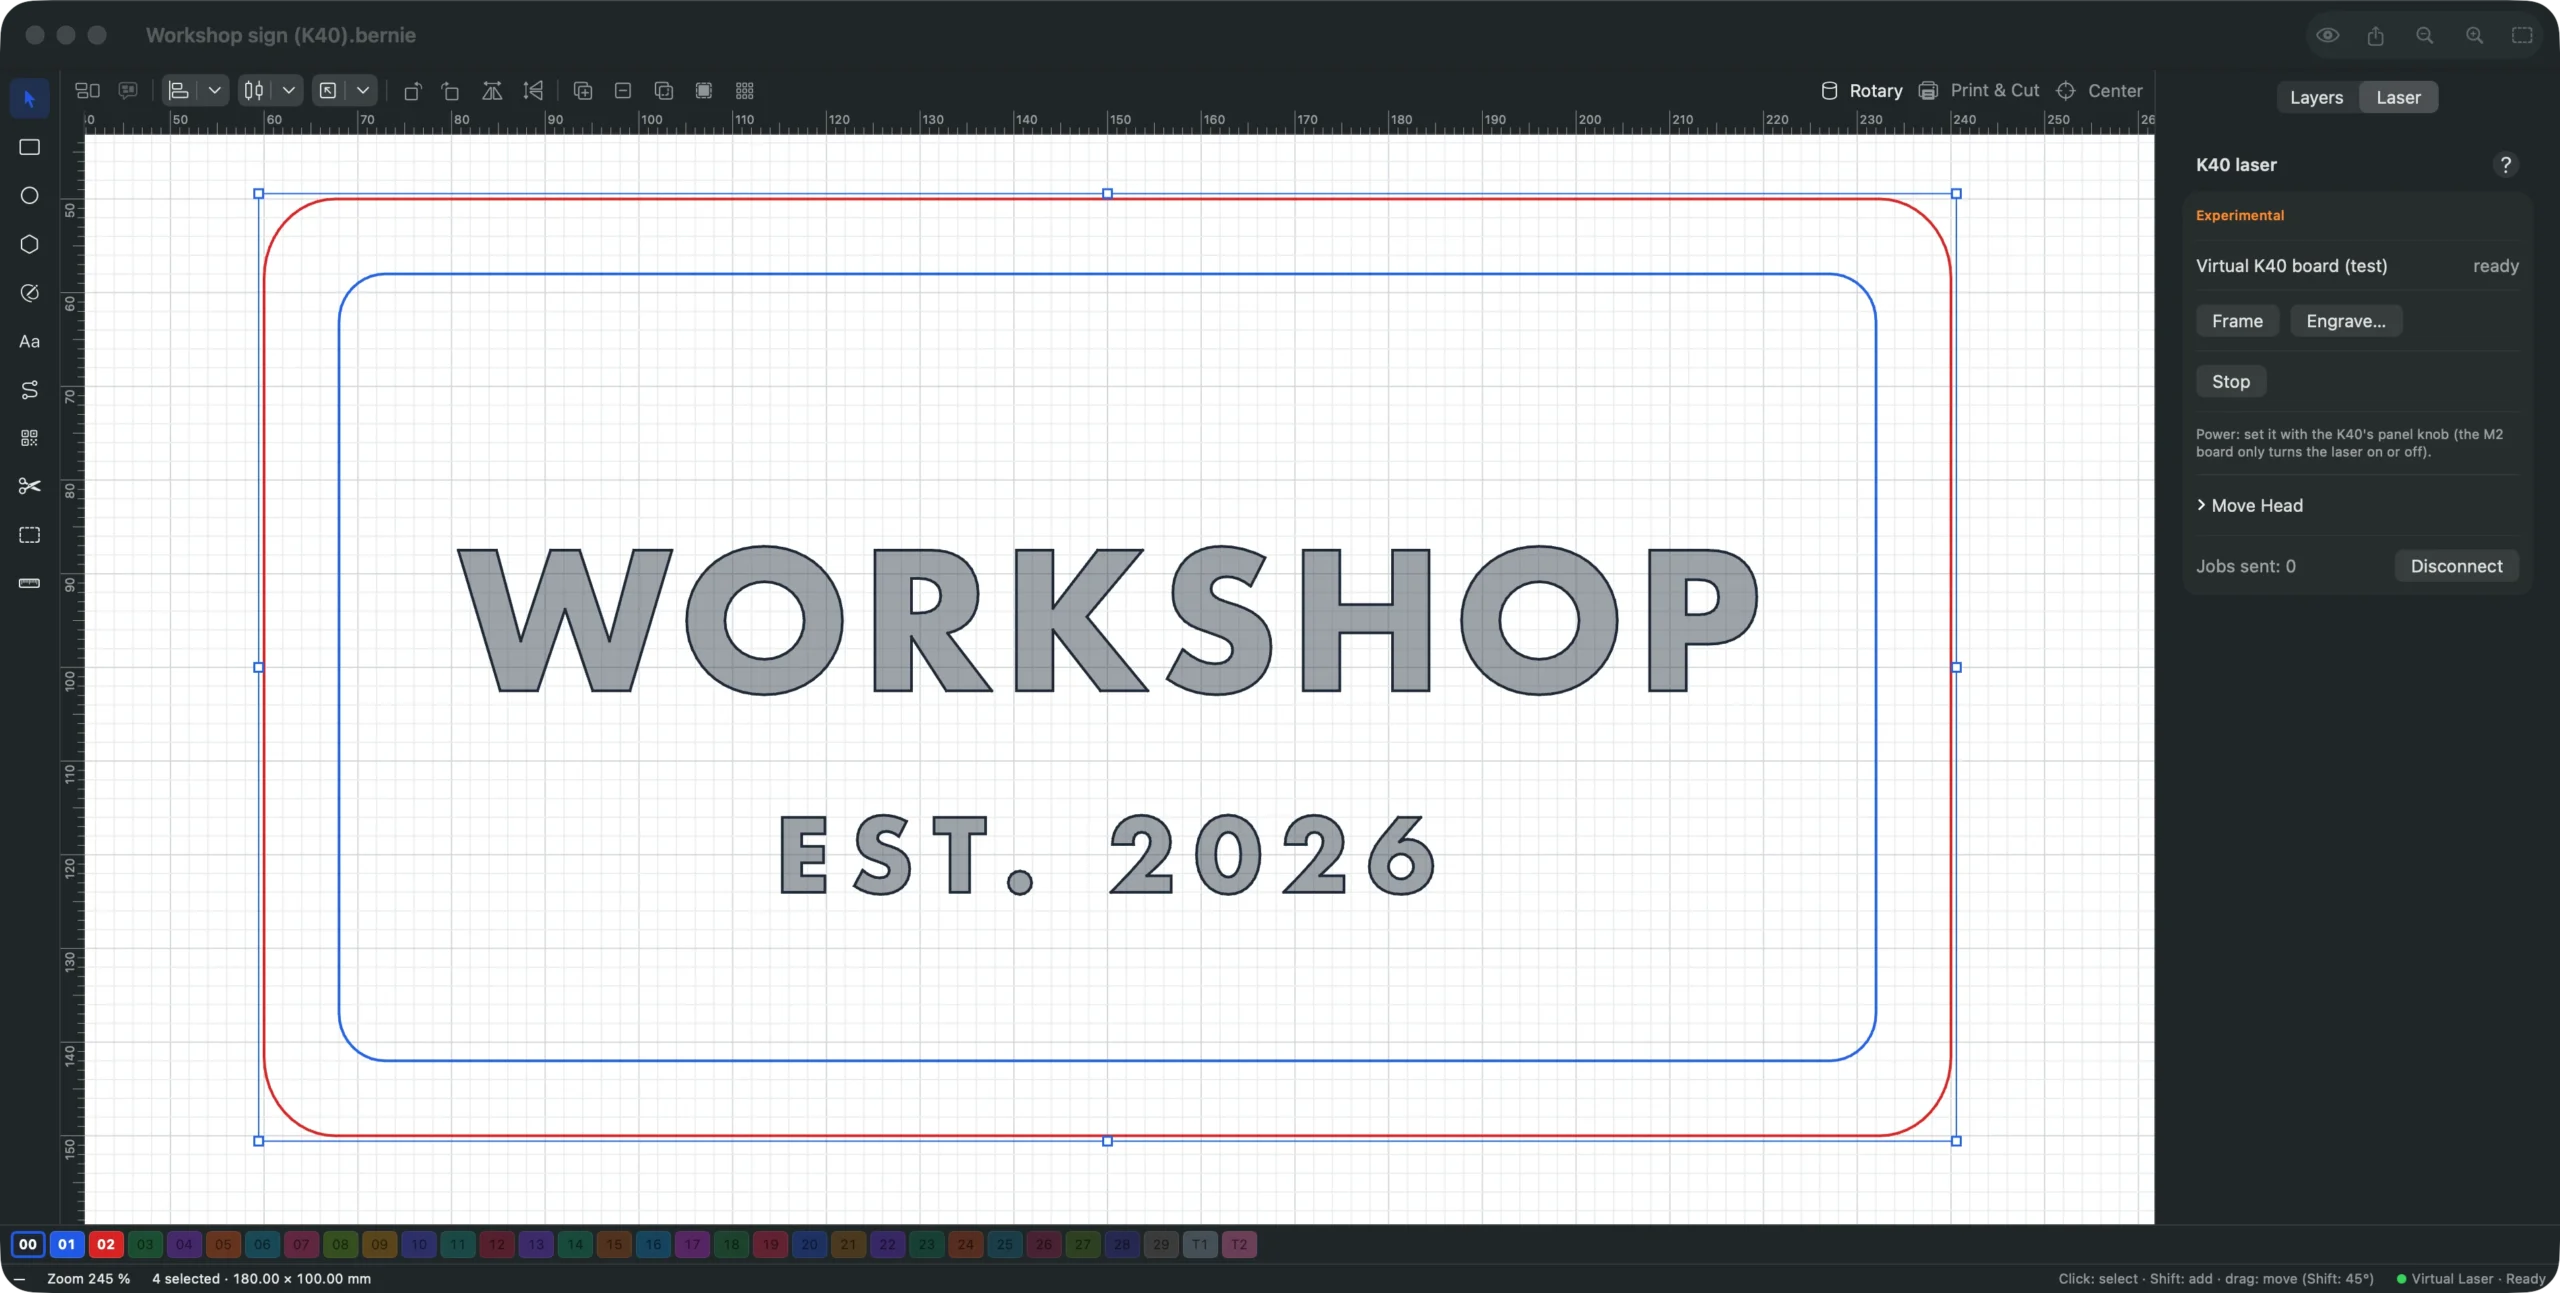
Every option is explained in the manual’s K40 laser section. For starting speeds by material, see our laser settings guide; on an M2, convert its power percentages into a knob position you have tested on a scrap piece.
Try your stock K40 with Bernie
Repeat these steps on your own K40, with no board to buy: Bernie is free, with no account and no subscription, on Mac, Windows, Linux and in your browser with Bernie Studio.
One K40 for the whole house, with Bernie Link
An iPad has no USB port for a laser, and a K40 often lives in a garage, far from the computer. Bernie Link solves both: a Raspberry Pi or an old PC next to the K40 drives the board, and your devices send it their jobs over the local network. Install it with the --k40 option:
curl -fsSL https://bernie.websolutis.com/link/install.sh | sudo sh -s -- --k40
Add --k40-carte M3 for a board other than the M2, and --k40-serie followed by the serial number if your board asks for it. The installer sets up the USB access rule. Your Mac, iPad, iPhone and browser can then frame, move the head and engrave on the K40. Every job is confirmed on the device that sends it, after the same safety question. The Bernie Link page covers the boards it runs on and how to pair your devices.
JCZ galvo lasers: mark without EZCad
Fiber and other galvo lasers raise the same question. Most of them ship with a JCZ “LMC” board and EZCad2, which runs on Windows only. Bernie already prepared, simulated and exported galvo jobs for EZCad; it can now drive the JCZ board itself over USB, from the Mac, from Linux, and from Bernie Studio in Chrome or Edge on any computer, Windows included.
- Create the galvo device. In Settings › Devices, click New and choose “Galvo fibre 110 × 110 mm”, or tick Galvo laser in a profile. If EZCad is already set up, Import an EZCad Configuration (markcfg, Motors.ini)… brings over the field size, offsets and lens corrections.
- Free the board. Close EZCad. On Windows, give the board the WinUSB driver with Zadig (reinstall the EZCad driver to go back); on Linux, the .deb package installs the access rule.
- Connect. In the Laser panel, click Connect to the Board….
- Place the piece. Frame (Red Pointer) traces the job in a loop with the laser disabled, and follows the design while you edit it.
- Mark. Frame, Then Mark… or Mark… asks a safety question, then marks the job as the virtual galvo computes it, cylinder correction included. Stop stops at once, even a marking that has not started yet.
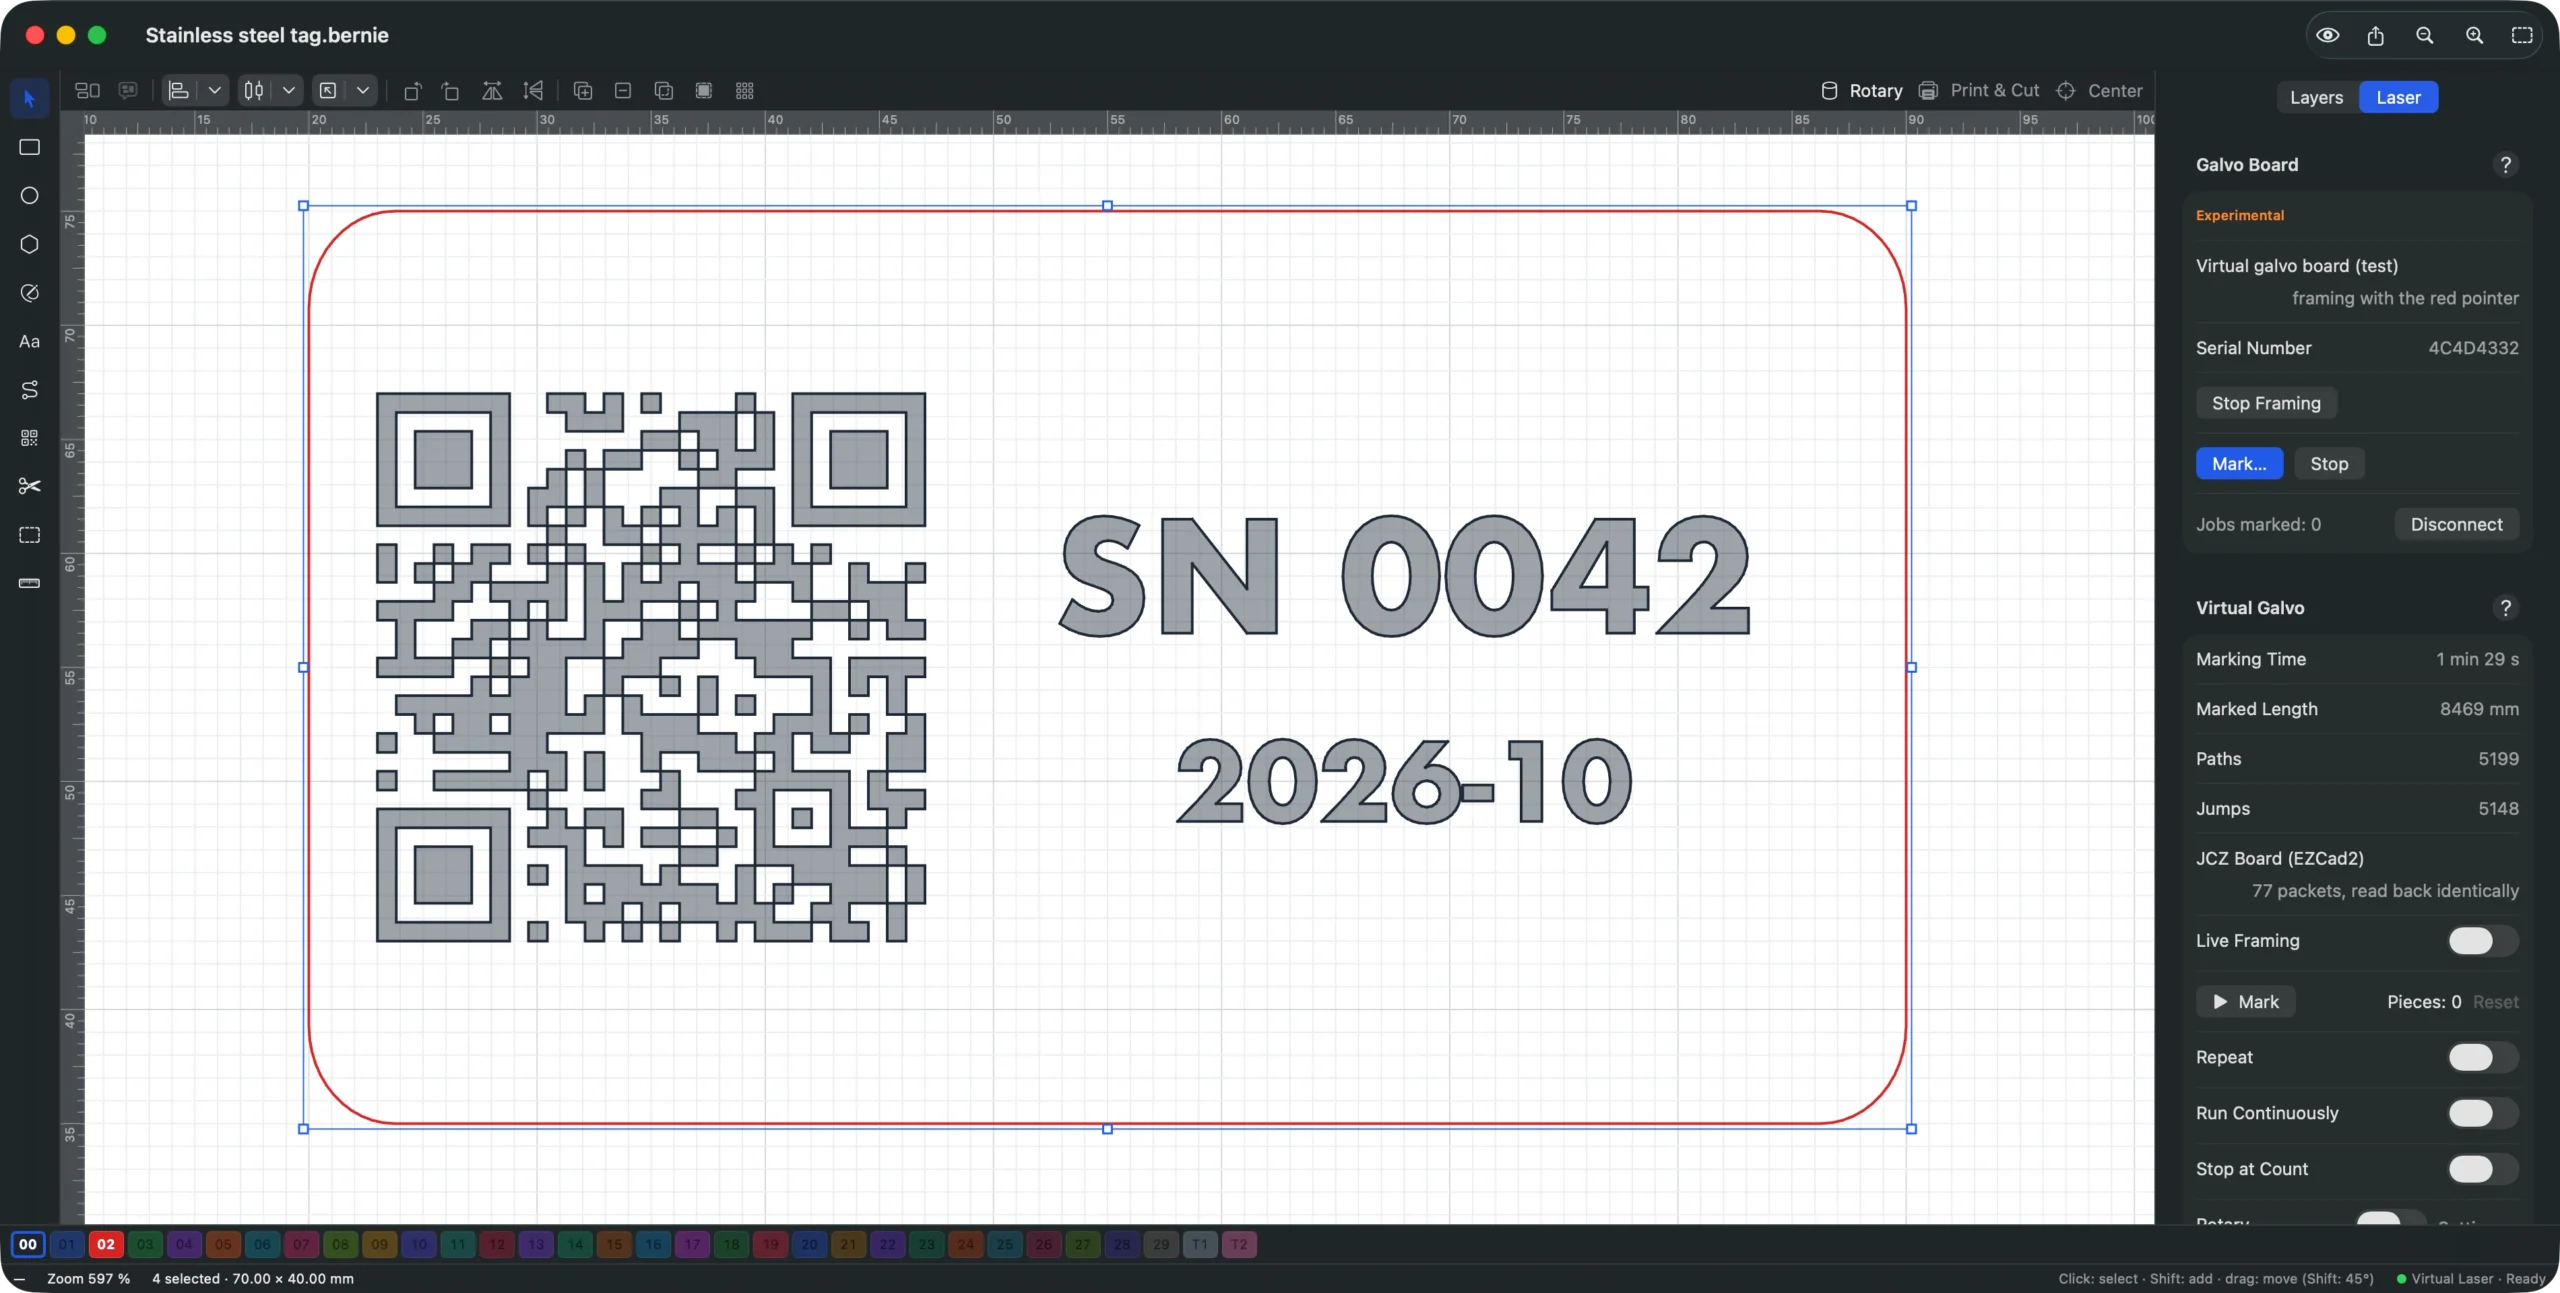
The rotary, the external axis and repeated marking are not driven directly yet: for those, export the job with Export for EZCad (.ezd, Experimental)… and run it from EZCad. On Bernie Link, the --galvo option shares the board the same way as a K40. To choose the settings for a first tag, see how to laser mark stainless steel. The galvo and fiber page lists everything Bernie does for galvo lasers, and the manual’s galvo lasers section details every setting.
Also new: 125 machines in the catalog
Picking your machine in the catalog sets the work area, port speed, macros and start G-code for you. The catalog now lists 125 models, with these recent additions:
- Creality: Falcon A1 (381 × 305 mm) and Falcon A1 Pro (358 × 268 mm), CR-Laser Falcon and Falcon2 Pro. The Falcon A1 is GRBL-compatible, and Bernie turns on its air assist (M8) on every layer.
- Acmer S1, P3 and P3 48 W; Atomstack A70 Max, A70 Pro and X40 Pro.
- Longer Ray5 and Ray5 20 W; NEJE Master 3 Max; TwoTrees TTS-55 Pro.
- Sculpfun C1, iCube, iCube Ultra, S30, S40 Max and S70 Max; the S30 Pro Max now has its current 370 × 360 mm work area.
- K40 CO2 40 W (M2 Nano), described above.
- LaserPecker LP2 Plus, LP4, LX1, LX1 Max and LX2, driven in G-code over USB with the manufacturer’s macros, and the Makera Carvera Air with its 5 W laser module.
xTool machines are driven over the network (Wi-Fi or their USB cable), the D1, D1 Pro and S1 over USB too. The full list, by brand, is on the compatible machines page, and connection and control covers USB, network and shared lasers.
Your first jobs: stay close to the machine
Every machine has its quirks. Treat your first jobs as tests, at low power, on a scrap piece.
Before the first job on a K40
- Water cooling running before the laser fires, every time.
- Fume extraction to the outside: the stock fan is often too weak.
- Goggles rated for the CO2 wavelength (10.6 µm), for everyone in the room.
- Never leave the laser unattended; keep a CO2 fire extinguisher at hand.
- Never cut PVC or vinyl: they release chlorine, toxic for you and corrosive for the machine.
- Lid closed, and your hand near Stop for the first jobs.
Something does not work as described on your K40 or galvo? Tell us through the contact page or the ideas page. Still choosing a machine? Our guide to diode, CO2, fiber and galvo lasers compares them, and the free LightBurn alternative guide explains how Bernie compares with LightBurn.
Frequently asked questions
Does LightBurn work with the K40 M2 Nano board?
No. LightBurn does not support the stock M2 Nano board, because it cannot control the laser power through software, and asks you to replace the board with another controller. To keep the stock board, use software written for Lihuiyu boards: LaserDRW, K40 Whisperer, MeerK40t or Bernie.
Can I control laser power from the software on a stock K40?
Not on an M2 Nano: the board only turns the laser on and off, and the power comes from the knob on the front panel. A recent M3 Nano board can receive power from the software, and Bernie then sends each layer’s power. For photos on an M2, use dithering.
Is there K40 software for Mac?
Yes. MeerK40t runs on macOS, K40 Whisperer can be installed from source, and Bernie drives the stock board directly from its Mac app or from Bernie Studio in Chrome or Edge.
Do I need to upgrade my K40 board to use Bernie?
No. Bernie drives the stock M2 Nano, M3 or B2 board over USB, with no new controller. If you have already upgraded to a GRBL board, Bernie drives that too, like any GRBL laser.
Can Bernie replace EZCad on a fiber laser?
For many jobs, yes. Bernie drives JCZ “LMC” boards (EZCad2) directly over USB: red-pointer framing, then marking after a safety question. The rotary, the external axis and repeated marking still go through an .ezd export to EZCad.
A stock K40 does not need a new board to be useful: it needs software that speaks its language. Bernie now does, for free, on the computers you already have. Download Bernie, connect your K40, and frame your first job.