To laser engrave glass, you do not cut into it: the beam heats the surface until tiny flakes break off, which leaves a frosted white mark. A CO2 laser does it directly, at low power and high speed, with a damp paper towel or a thin film of dish soap on the glass to spread the heat and limit chipping. A diode laser cannot mark clear glass on its own, because its blue light passes straight through: coat the glass with dark paint or a marker first. A fiber laser does not mark clear glass either.
Below: which laser does what on glass, starting settings, the tricks that keep the frosting smooth, and a complete tutorial in free software for a 100 mm glass coaster with a drawing, a script word and two names. The same steps work for a mirror, a picture frame or a glass cutting board.
Which laser can engrave glass?
| Laser | Clear glass | How | Result |
|---|---|---|---|
| CO2 (10.6 µm) | Yes | Directly, low power, high speed | Frosted white mark in the surface |
| Diode (blue, 450 nm) | Not directly | Coat with tempera paint, a black marker or marking spray | Lighter, finer frosting; the coating washes off |
| Fiber (1064 nm) | No | Passes through clear glass | Only on coated or backed glass |
| UV (355 nm) | Yes | Directly, cold marking | Very fine marks, even inside crystal |
Glass absorbs the far infrared of a CO2 tube, so a CO2 laser is the tool for glasses, bottles, mirrors and coasters. A diode’s blue light goes through clear glass without heating it: the coating does the absorbing, and the heat it picks up frosts the surface below. Our guide to diode, CO2, fiber and galvo lasers compares the machines for every material.
Starting settings to laser engrave glass
Glass needs less energy than most people expect. Too much power cracks the surface into rough chips instead of a smooth frost, and a deep mark is not whiter, just rougher. Start low and fast, and add a second pass if the frost is too light.
| Laser | Speed | Power | Line interval | Notes |
|---|---|---|---|---|
| CO2 40 to 60 W | 200 mm/s | 20 % | 0.1–0.15 mm | The starting values in Bernie’s CO2 library |
| CO2 80 to 100 W | 300–400 mm/s | 15–20 % | 0.1–0.15 mm | Lower power, or the glass chips |
| Diode 5 to 20 W, coated glass | As for dark wood | 60–80 % of your wood power | 0.1 mm | Coat evenly; test first |
A coarser line interval than wood, around 0.1 to 0.15 mm (170 to 250 DPI), gives a smoother frost: lines too close together reheat the glass that has just flaked. For a photo, a coarse halftone or Atkinson dithering does better than a fine Stucki pattern, as explained in our guide on how to laser engrave a photo. Every glass is different, so a power and speed grid on a spare piece is worth the ten minutes.
Lead crystal and tempered glass
Thin glass, tempered glass and some crystal crack more easily under heat. Use the lowest power that frosts, two light passes rather than one strong one, and let the piece cool between jobs.
Tricks for a smooth, even frost
- Clean the glass. Wipe it with isopropyl alcohol: fingerprints and grease show up as patches in the frost.
- Damp paper towel. Lay a thin, damp sheet of paper towel or newspaper over the area, without wrinkles. It carries the heat away and gives a more even mark. Epilog, a laser maker, recommends it.
- Or a film of dish soap. A thin coat spread with a finger does the same job, and it keeps the paper from drying out if you use both.
- Lighter “black”. Large solid areas chip less when they are engraved at about 80 % grey instead of full black, or with a halftone.
- Engrave the back. On a coaster, a picture frame or a mirror, engrave the underside and mirror the design: it reads the right way from the front, and the frost is protected from wear.
- Clean up after. Rinse the glass, then rub the mark lightly with a non-scratch pad to remove loose flakes.
On a diode laser, the coating replaces the paper towel: brush on a thin, even coat of tempera paint, or color the area with a black permanent marker, let it dry, engrave, then wash it off under running water. An uneven coat gives an uneven frost, so two thin coats beat one thick one.
How to laser engrave a glass coaster in Bernie
Bernie is free laser engraving and cutting software, funded by donations. It drives the CO2 and diode lasers most people use, listed on the compatibility page, and has the material library and test grid that glass calls for. Here is the whole job for a 100 mm round glass coaster, engraved on a CO2 laser.
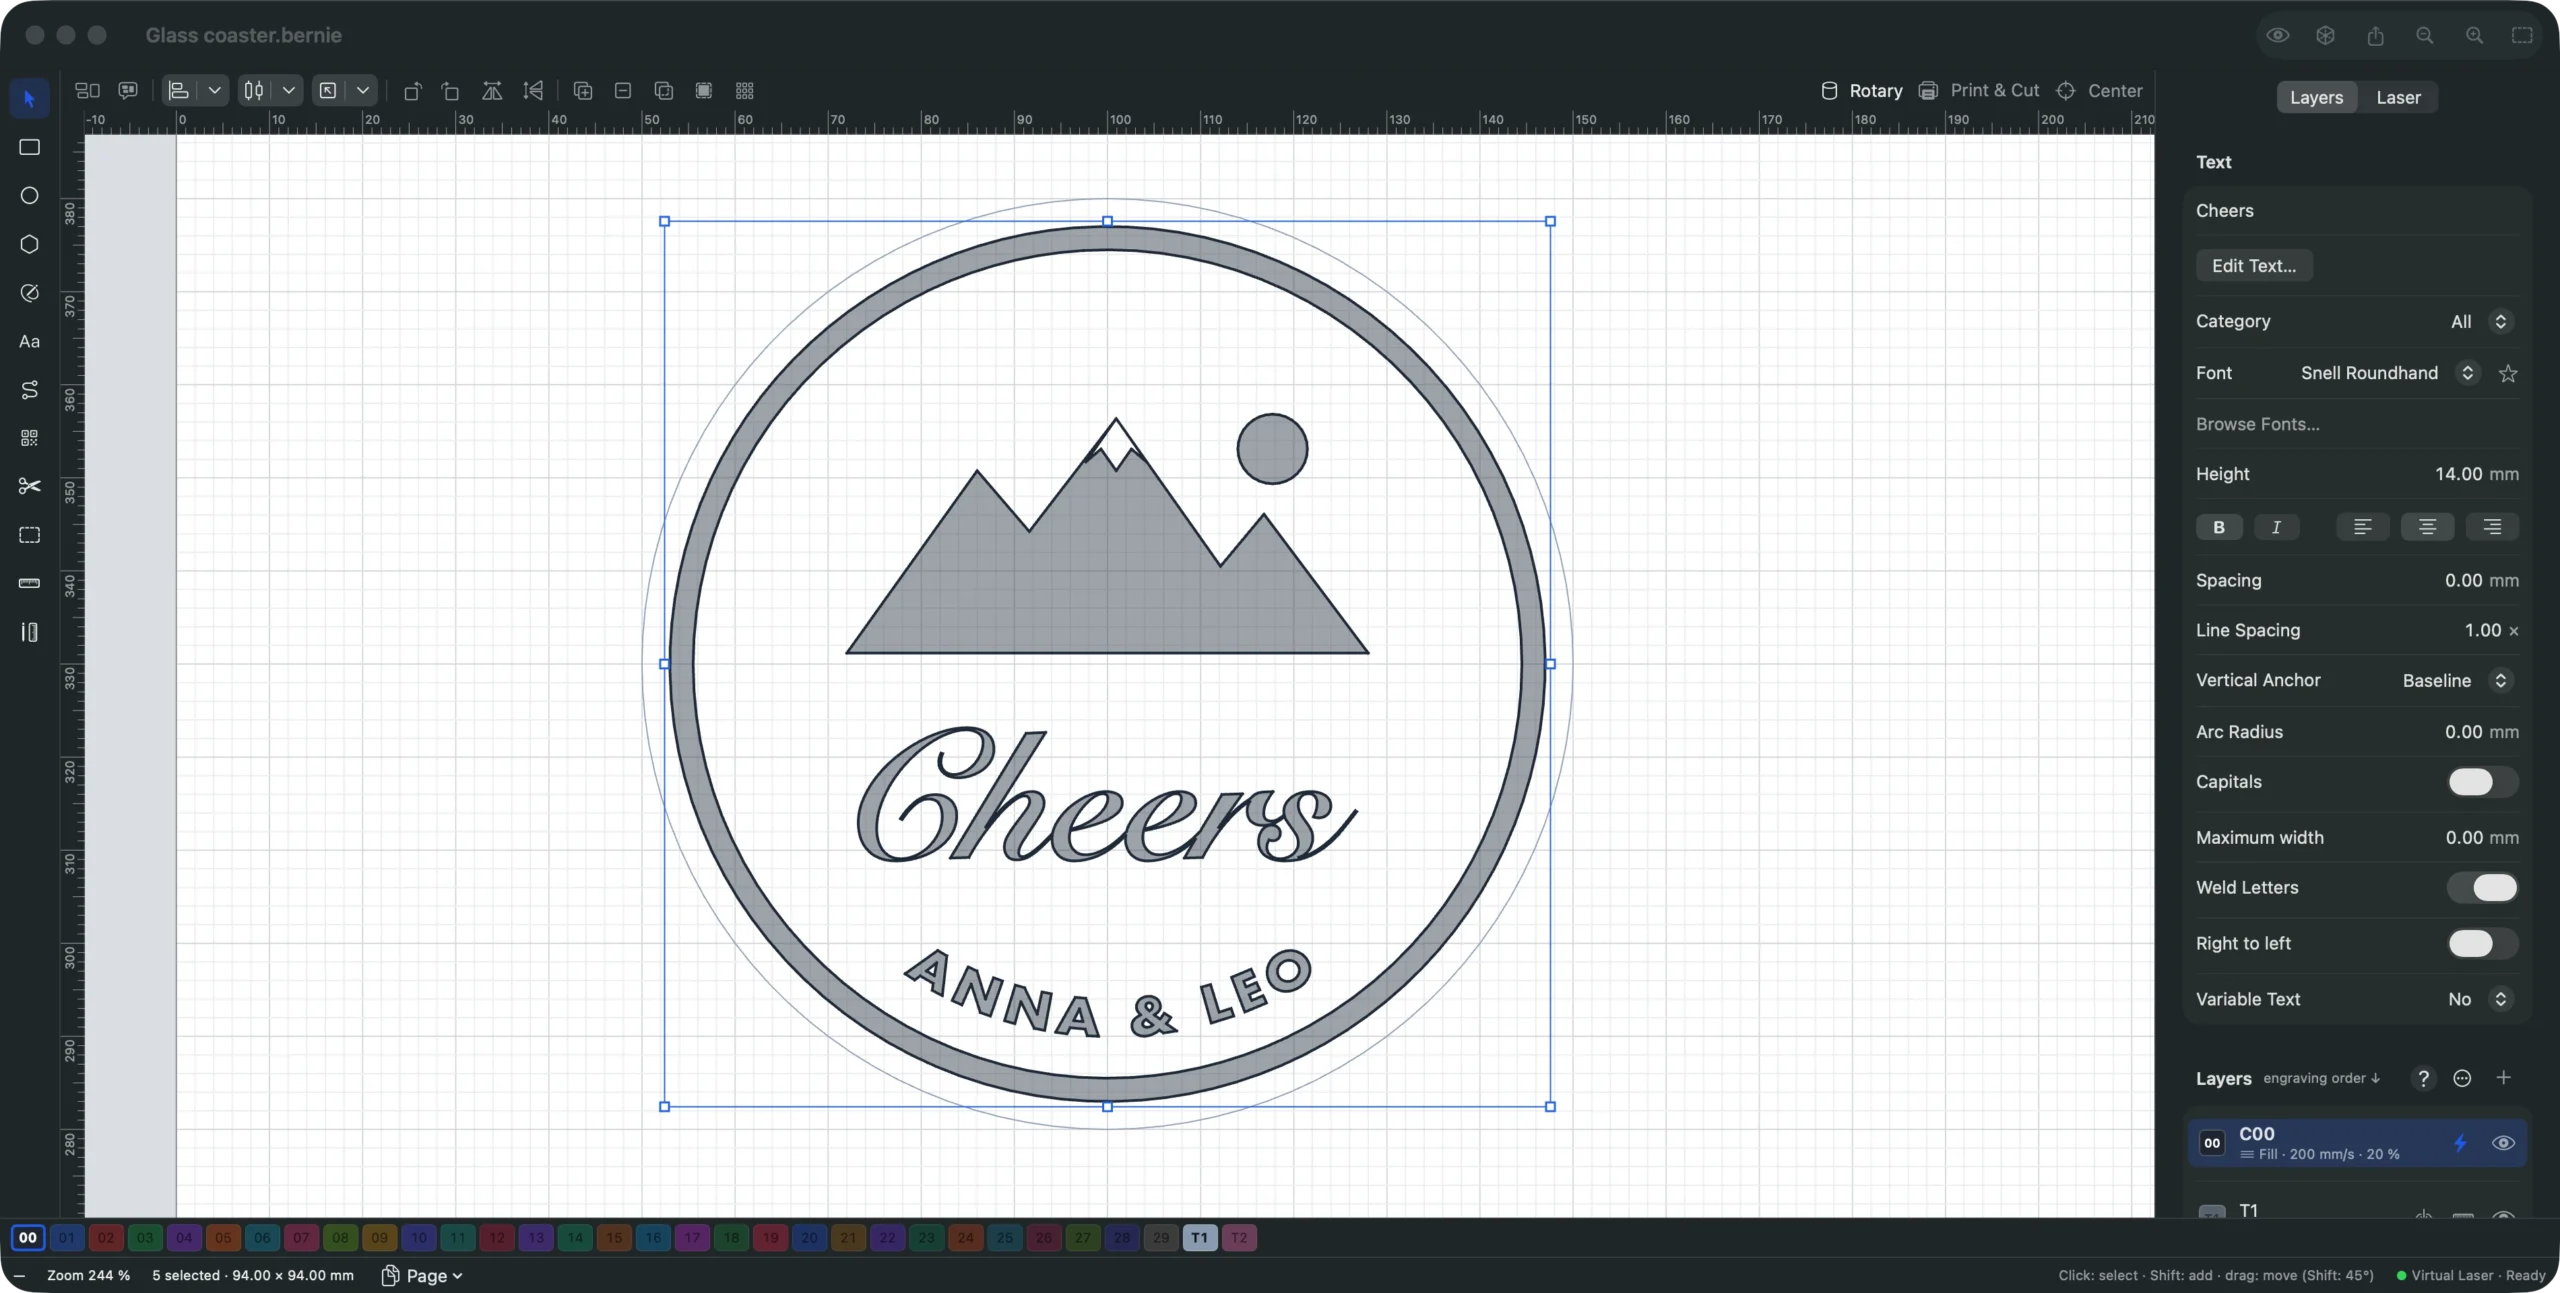
- Draw the coaster as a template. Long-press + next to Layers and choose the tool layer T1. Pick the Ellipse (E) tool, hold Shift and drag a circle, then type 100 × 100 mm in the inspector. A tool layer is never engraved: it only shows where the glass is.
- Add the drawing. Click the first layer in the Layers list, then use File › Import… for an SVG drawing of your own (here, mountains and a sun), size it to about 56 mm wide in the inspector and center it on the coaster.
- Add a border ring. Draw two circles of 94 and 89 mm centered on the coaster. Select the large one first, then Shift-click the small one, and choose Shapes › Subtract (Remove the Last Selected Shape): you get a thin ring.
- Write the word. With the Text (T) tool, click and type Cheers, choose a script font at 14 mm and turn on Weld Letters, so the overlapping letters become one outline and are not frosted twice.
- Curve the names. Add a second text in a bold sans serif at 4 mm, and give it a negative Arc Radius (-36 mm) in the inspector so it follows the bottom of the ring. Our tutorial on how to curve text covers arcs and paths.
- Load the glass settings. Open the Material Library, choose Manage › Add a Starter Library and pick Starter — CO2 40 to 60 W. Select Glass, Surface, and click Apply to Layer with the engraving layer active: Fill, 200 mm/s, 20 %.
- Widen the line interval. In the layer settings, set the Line Interval to 0.15 mm. If you engrave the back of the coaster, select everything and use Mirror H so the design reads correctly through the glass.
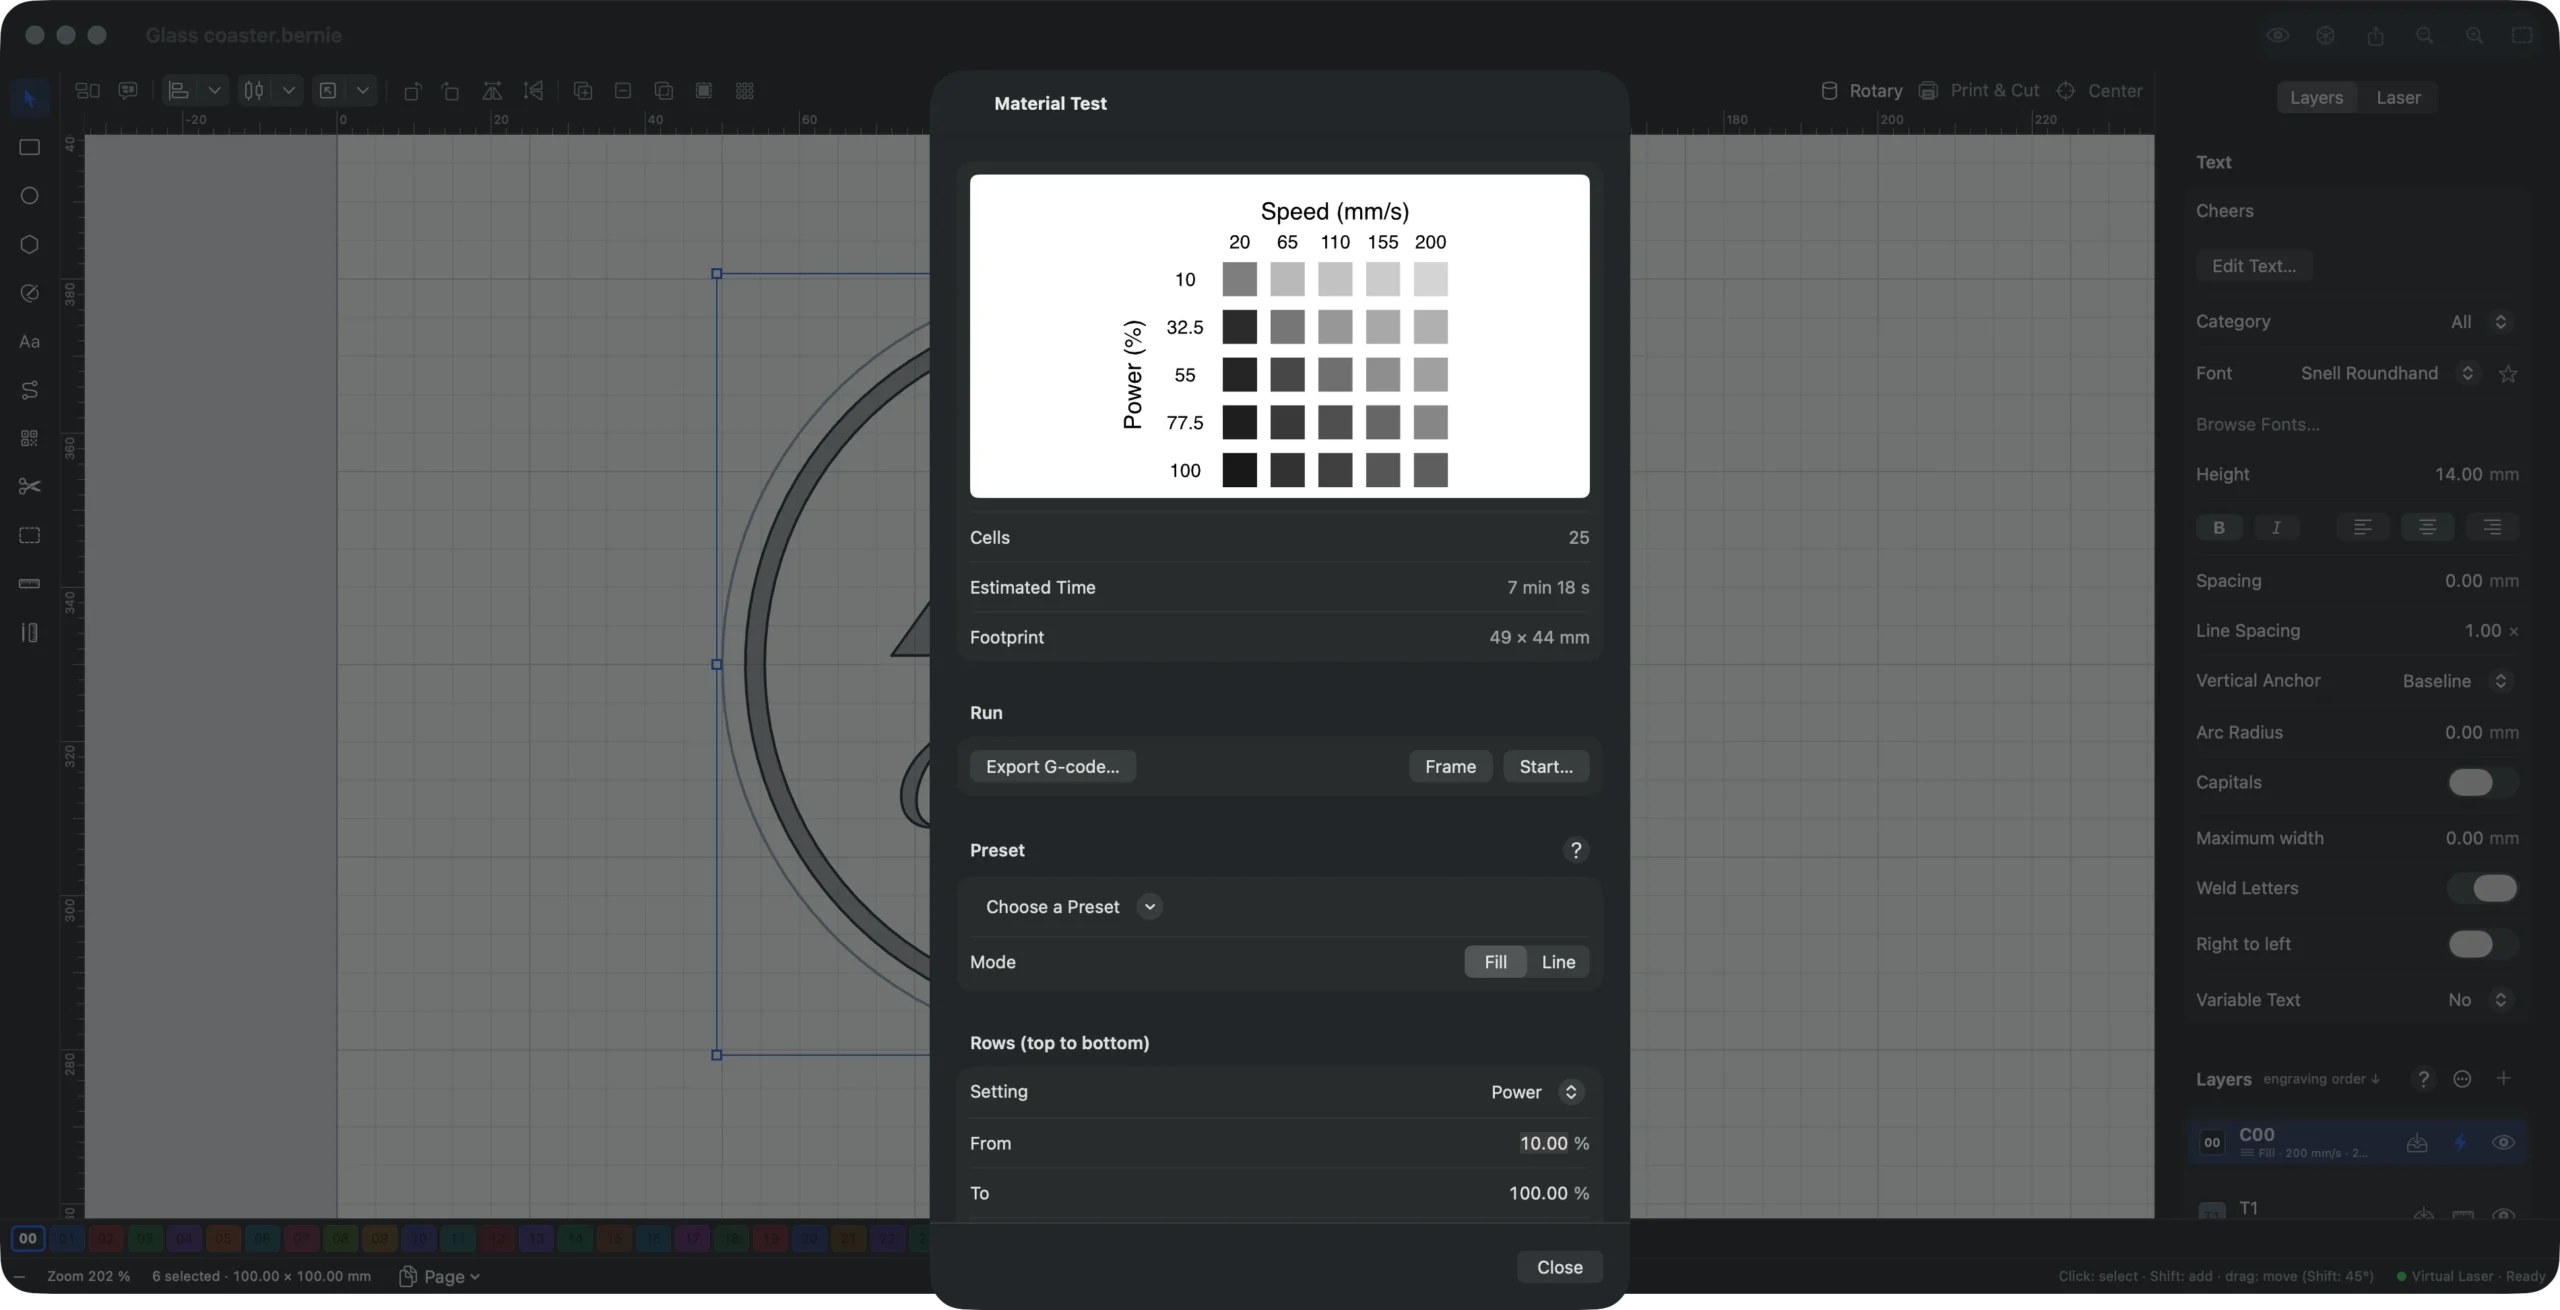
- Test on a spare piece. Choose Laser › Material Test… and, under Preset, pick Engrave: Power × Speed. Engrave the grid on a spare glass, find the smoothest white cell, and use Keep a Cell to save it in the library, then apply it to your layer.
- Check the preview. Click the eye button (⇧⌘P): you see the paths and the estimated time, and the Pre-flight check flags open shapes on a Fill layer or duplicates. Nothing on the T1 layer is engraved.
- Frame and start. Lay the damp paper towel on the glass, connect the laser in the Laser panel, click Frame to check the position, then Start. Stay with the machine until the end.
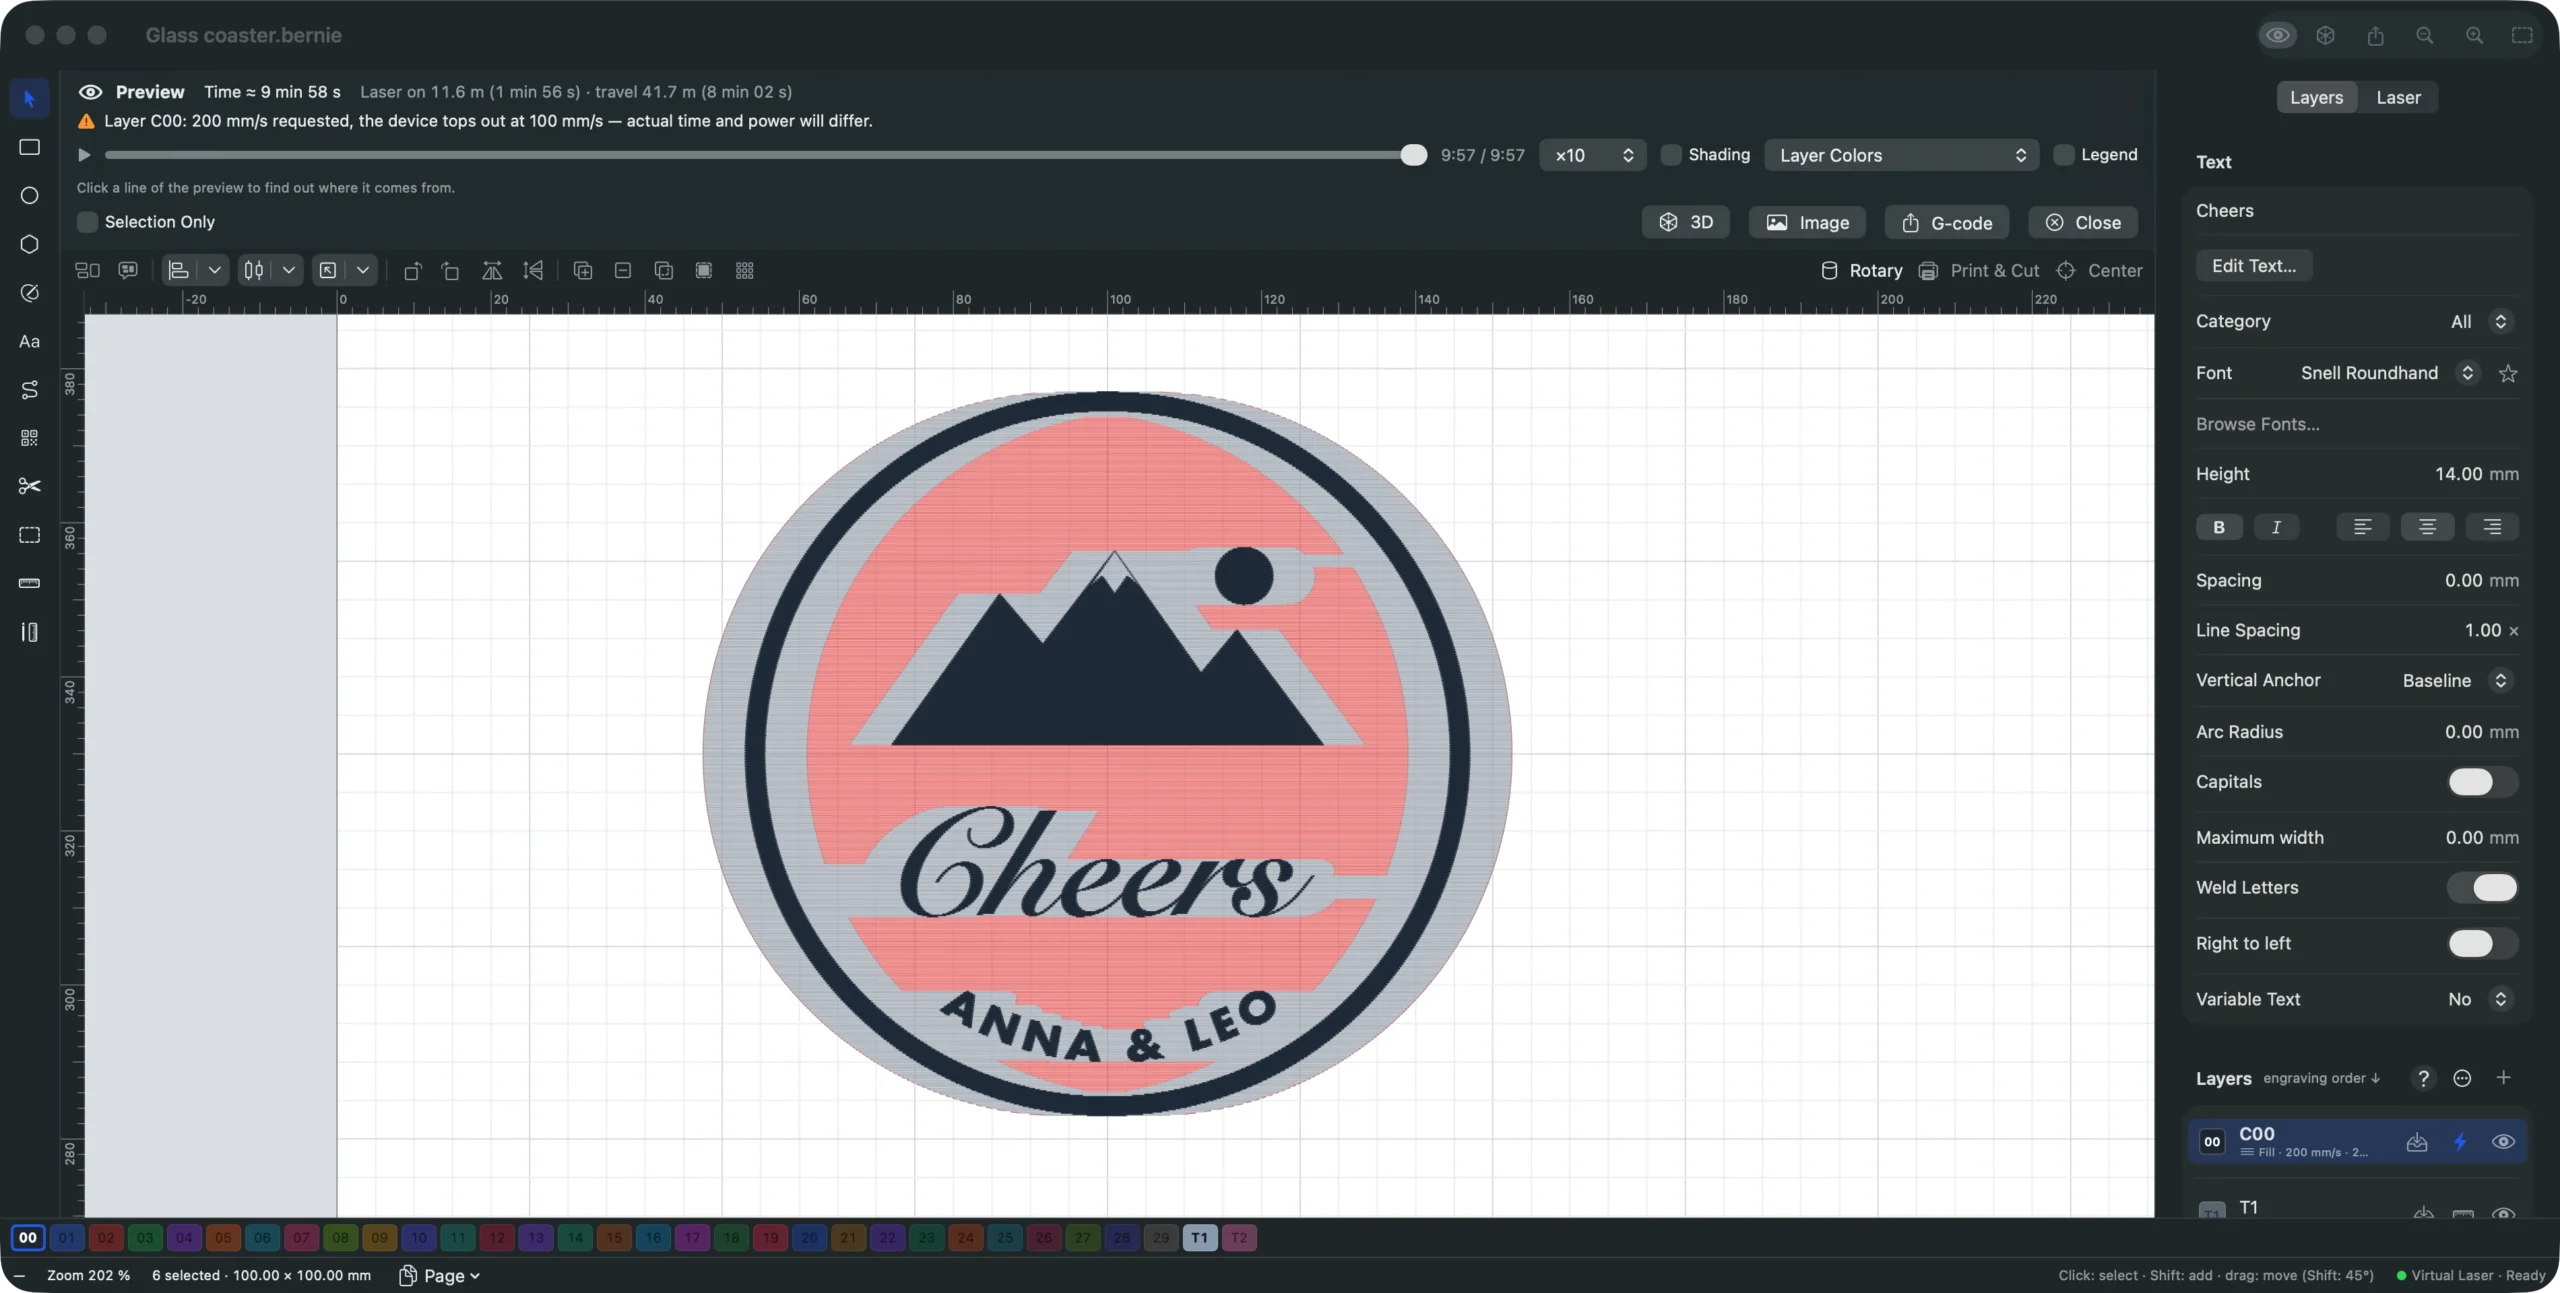
The preview and pre-flight check page shows what the checks catch, and the manual’s Material Library and Test section explains every test preset, from power and speed to the line interval.
Engrave your first glass for free
Repeat these steps with your own laser: Bernie is free, with no account and no subscription. It runs on Mac, Windows and Linux, on iPad, and in Chrome or Edge with Bernie Studio, which reaches a USB laser through WebSerial.
Engraving a photo, a wine glass or a bottle
A photo on glass
Frosted glass is white where the laser marks, so a photo engraved as it is comes out as a negative. Import it on a layer in Image mode and tick Negative Image, choose Halftone or Atkinson in the image settings, and keep the interval around 0.15 mm. Placing a dark card behind the glass makes the photo stand out. The images and photos page lists every dithering mode.
Wine glasses, tumblers and bottles
A round object needs a rotary. Chuck rotaries hold stemmed glasses, roller rotaries suit straight bottles. The settings stay the same; the frost is easier to keep even on a straight glass than on a tapered one. Our tutorial on engraving a tumbler with a rotary covers the rotary setup in Bernie, and the camera and rotary page sums it up.
Common problems and quick fixes
| Problem | Likely cause | Fix |
|---|---|---|
| Rough, chipped mark | Too much power, interval too fine | Lower power, 0.15 mm interval, damp paper |
| Patchy frost | Grease, dry paper, uneven coating | Clean with alcohol, keep the paper damp, two thin coats |
| Nothing on clear glass (diode) | Blue light passes through | Coat the glass with tempera or a black marker |
| Glass cracks | Too much heat, thin or tempered glass | Two light passes, let it cool between jobs |
| Photo looks inverted | Frost is white | Tick Negative Image |
| Text reads backwards from the front | Engraved on the back without mirroring | Mirror H before engraving |
Safety
Glass flakes are sharp: wear gloves to handle a fresh engraving and rinse it before use. Never leave a laser running unattended, keep an extinguisher within reach, run the fume extraction, and wear goggles rated for your laser’s wavelength if the machine is open. A cracked glass can break further when you move it, so let it cool first.
With a CO2 laser, low power, a 0.15 mm interval and a damp paper towel, glass takes a smooth frosted mark in minutes; with a diode laser, a coat of paint does the trick. Download Bernie for free and engrave your first glass coaster.
Can you laser engrave glass with a diode laser?
Not clear glass on its own: the blue light of a diode laser passes through it. Coat the area with tempera paint, a black permanent marker or a laser marking spray, engrave, then wash the coating off. Colored or opaque glass sometimes marks without a coating.
What are good CO2 settings for engraving glass?
Start low and fast: about 200 mm/s at 20 % on a 40 to 60 W CO2 laser, with a line interval of 0.1 to 0.15 mm. Stronger tubes need less power. Confirm with a power and speed test on a spare piece.
Why does my laser engraved glass chip?
Usually too much power or lines too close together, which overheat the surface. Lower the power, widen the interval, engrave large areas at about 80 % grey, and lay a damp paper towel or a film of dish soap on the glass.
Can a fiber laser engrave glass?
Not clear glass: its infrared light passes through. A fiber laser can mark coated or backed glass, and a UV laser marks clear glass and crystal directly.
Should I engrave the front or the back of a glass coaster?
The back, with the design mirrored, if the glass is clear: the mark reads correctly from the front and stays protected from cups and wear. Engrave the front on tinted glass or when you want to feel the frost.
Is Bernie free for glass engraving?
Yes. Bernie is free, funded by donations, with no account and no subscription, and its CO2 starter library already includes a glass setting.